


There’s something magical about biting into a perfectly steamed dumpling filled with fresh, seasoned vegetables. Veg momos have captured hearts across the globe, transforming from a traditional Himalayan comfort food into everyone’s favorite healthy snack. If you’ve been buying them from street vendors or restaurants, it’s time to discover how incredibly satisfying it is to make these delicate parcels of goodness in your own kitchen.
The Rising Popularity of Veg Momos
What started as a humble mountain dish has evolved into one of the most beloved street foods today. Veg momos represent the perfect fusion of health and taste – something that’s becoming increasingly rare in our fast-food world. These steamed dumplings offer a guilt-free indulgence that satisfies both your taste buds and your nutritional needs.
The appeal lies in their versatility and wholesome nature. Unlike heavy, oil-laden snacks, veg momos provide a light yet filling option that works equally well as an appetizer, evening snack, or even a light meal.
Nutritional Advantages That Set Veg Momos Apart
Choosing veg momos means choosing wellness without compromising on flavor. Here’s why they’re such a smart food choice:
The steaming process preserves the natural vitamins and minerals in vegetables while keeping the calorie count reasonable. Cabbage provides vitamin C and fiber, carrots add beta-carotene and natural sweetness, while onions contribute antioxidants and flavor depth. The absence of deep-frying means you’re getting maximum nutrition with minimal processed fats.
Mastering the Art of Veg Momos: A Detailed Recipe
Essential Ingredients
Dough Components:
- 2 cups all-purpose flour
- ½ teaspoon salt
- Water for binding
Vegetable Mixture:
- 1 cup finely shredded cabbage
- ½ cup grated carrot
- ½ cup chopped onion
- 2 minced green chilies
- 1 teaspoon ginger-garlic paste
- 1 teaspoon soy sauce
- ½ teaspoon black pepper powder
- 1 tablespoon cooking oil
- Salt according to preference
Accompanying Chutney:
- 4-5 dried red chilies
- 2 boiled tomatoes
- 4 garlic cloves
- ½ teaspoon vinegar
- Salt for seasoning
Detailed Preparation Process

Creating the Foundation Dough
Begin by combining flour and salt in a spacious bowl. Slowly incorporate water while mixing continuously until the mixture forms a cohesive mass. Knead thoroughly for 5-7 minutes until the dough becomes smooth and pliable. Proper kneading develops the gluten, which gives momos their characteristic chewy texture. Wrap the dough in a damp cloth and allow it to rest for exactly 20 minutes.
Crafting the Vegetable Filling
Warm oil in a heavy-bottomed pan over medium flame. Introduce the chopped onions, green chilies, and ginger-garlic paste, cooking until aromatic and the onions become translucent. Add the prepared cabbage and carrot, then season with soy sauce, black pepper, and salt. Cook for 2-3 minutes, stirring frequently to ensure even cooking while maintaining some crunch. Remove from heat and cool completely to room temperature.
The Art of Shaping
Divide your rested dough into walnut-sized portions. Using a rolling pin, flatten each piece into a thin, round wrapper approximately 3-4 inches across. Place one heaping teaspoon of cooled filling at the center. Here’s where technique matters – bring the edges together and create small pleats while sealing, forming a traditional dumpling shape. The sealing must be tight to prevent filling from escaping during steaming.
Steaming for Perfection
Prepare your steamer by greasing the rack or lining with parchment paper. Arrange the shaped momos with space between each one to prevent sticking. Steam over boiling water for 10-12 minutes. You’ll know they’re done when the wrappers turn translucent and feel firm yet tender.
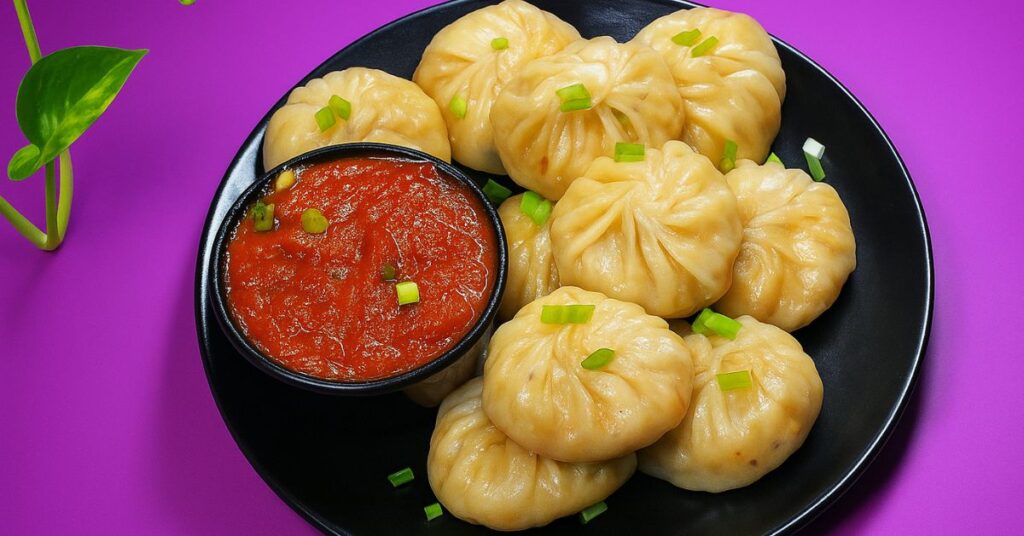
Preparing the Signature Chutney
Combine boiled tomatoes, garlic, dried red chilies, vinegar, and salt in a food processor. Blend until you achieve a smooth, vibrant red consistency. This fiery accompaniment provides the perfect contrast to the mild, comforting flavors of the steamed dumplings.
Expert Techniques for Momo Success
Dough Consistency Matters: Your dough should be firm enough to roll without sticking, yet soft enough to stretch without tearing. If it feels dry, add water drop by drop. If too sticky, dust with flour gradually.
Filling Preparation: Always cool your filling completely before assembling. Warm filling can make the dough soggy and difficult to handle.
Pleating Perfection: Don’t stress about making perfect pleats initially. Focus on creating a tight seal to prevent the filling from leaking out during steaming.
Steaming Success: Maintain consistent steam throughout the cooking process. Lifting the lid frequently can affect cooking time and texture.
Creative Variations to Try
Once you’ve mastered the basic veg momos, experiment with these exciting variations:
Protein-Enhanced Version: Add crumbled paneer or finely chopped mushrooms to boost protein content.
Spice Level Adjustments: Increase green chilies or add a pinch of red chili flakes for heat lovers, or reduce spices for milder palates.
Herb Infusion: Fresh cilantro, mint, or green onions can add wonderful aromatic notes to your filling.
Whole Grain Option: Substitute half the all-purpose flour with whole wheat flour for added fiber and nutrition.
Serving Ideas That Elevate Your Momo Experience
Veg momos shine as versatile crowd-pleasers. Serve them as:
- Teatime Companions: Perfect with hot masala chai on rainy evenings
- Party Appetizers: Impressive starters that disappear quickly at gatherings
- Light Dinner: Pair with clear vegetable soup for a complete, satisfying meal
- Lunch Box Heroes: They travel well and taste great even at room temperature
Storage and Reheating Tips
Freshly made veg momos taste best, but you can prepare them ahead for convenience. Uncooked shaped momos can be frozen on a tray and stored in freezer bags for up to a month. Steam directly from frozen, adding 2-3 extra minutes to the cooking time.
For reheating leftover steamed momos, a quick 2-3 minute steam works better than microwaving, which can make them tough.
Why Making Veg Momos at Home Wins
Creating veg momos in your kitchen gives you complete control over ingredients and freshness. You can ensure the vegetables are crisp, the seasoning is just right, and there are no unwanted preservatives or excessive sodium. Plus, the process itself is therapeutic – there’s something deeply satisfying about creating these little packages of joy from scratch.
The cost savings are significant too. A batch of homemade veg momos costs a fraction of what you’d pay at restaurants, and you get the satisfaction of knowing exactly what goes into your food.
Troubleshooting Common Momo-Making Challenges
Dough too stiff? Add water gradually and knead until smooth. Filling too wet? Cook it a bit longer to evaporate excess moisture before using. Momos breaking during steaming? Check if the dough is rolled too thin or if the pleating isn’t tight enough. Bland taste? Don’t forget the black pepper and soy sauce – they’re game-changers for flavor.
Final Thoughts on Your Veg Momos Journey
Making veg momos at home is more than just preparing food – it’s about connecting with a rich culinary tradition while creating something delicious and healthy for yourself and your loved ones. The combination of fresh vegetables, aromatic spices, and the gentle steaming process creates a snack that’s both comforting and energizing.
Whether you’re new to making dumplings or looking to perfect your technique, this recipe provides a solid foundation for creating restaurant-quality veg momos in your own kitchen. The accompanying spicy chutney adds that authentic touch that transforms these simple steamed dumplings into an unforgettable culinary experience.
So gather your ingredients, roll up your sleeves, and get ready to fill your home with the irresistible aroma of freshly steamed veg momos. Your taste buds – and your family – will thank you for it!